Wait. No. Not that! Not on your grill! As we get into July—national grilling month—and especially that granddaddy of all grilling holidays—Independence Day—we need to get serious about that staple of the grill, the hamburger. There are literally millions of ways you can prepare burgers, each with different seasonings, different toppings, different stuffings, but they all need to be cooked properly to prevent foodborne illness and ensure just the right tenderness and juiciness. To help you prepare for this grilling month, we’ve done the thermal legwork so that you can make safe, tasty, impressive burgers for your family and friends.
TEMPERATURE BASICS FOR GRILLED BURGERS
First, let’s lay down the ground rules. Store-bought ground beef must be cooked to an internal temperature of 160°F (71°C) to be considered safe to eat. Why is that, when I can eat a medium rare steak that is 30°F (17°C) cooler? Because of the grinding process itself. You see, bacteria don’t tunnel or even try to travel at all, and that means that pretty much all the bacteria on a steak are living on the surface. If you sear a steak at a high temperature, you’ll kill the bacteria on the outside, but since there aren’t any inside, you don’t have to worry about them. But if you grind that steak up and turn it into a ribeye burger (yum), you’ve taken all the bacteria living on the outside of the steak and distributed them throughout your patty. And since any piece of meat is only as cooked as its least cooked part, you need to cook the ground beef to 160°F (71°C) to ensure it is safe to eat. Of course, with carryover cooking, that means you’ll want to pull your burgers at 155°F (68°C) to achieve the best temp possible.

Ok, basics out of the way, let’s talk a little about nuance. There is a way to bend those rules by grinding your own meat for your burgers. If you buy your ground beef prepackaged, you don’t know what cuts were used, how long it has been mixed together, or anything else. If you buy a piece of good, well-marbled chuck and grind it fresh just minutes before you grill it, you have more knowledge about—and less risk from—your burgers. Not only can you cook a home-ground burger to an astonishingly juicy medium rare (130–135°F [54–57°C]), but you can choose the flavor profile of your burger by fiddling with the ratios of different cuts you use.
That being said, you may already have purchased 10 pounds of ground beef for the 4th of July, and that’s fantastic. Let’s talk about how to cook that the best way you can.
Note: the principles we’ll discuss below can also be applied to home-ground burgers. Simply adjust the temperatures accordingly.
HOW TO GRILL THE BEST BURGERS
The best way to hit your temperature target when grilling burgers is to use the two-stage cooking method. The two-stage method means setting up your grill with a lower-heat section and a high-heat section. You start your food on the unheated side, allowing only the ambient heat from the hot side to cook it. When you come within range of your desired final temperature, you move the meat to the hot side for a final sear. This is different than the standard method that most people use: slapping burgers directly over high heat and cooking them until they are “done.”
WHY COOK THE BURGERS IN TWO STAGES?
If you’re wondering what the point is, why bother with a two-stage cook, the answer is this: control. By approaching the final temperature more slowly, you keep the thermal “momentum” in your burgers low, thus making it easier to hit your target pull temperature.
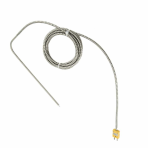
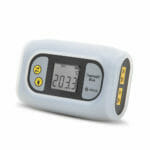
To show this is true, we cooked 5 oz burgers over direct heat and over indirect heat followed by a sear and we recorded the data to see the differences. 5 oz patties ready for grilling were used to perform the experiment, we used an armor cable Type-K thermocouple probe and a ThermaQ® Blue.  And at this point, I need to say something about our method. We do not, as a rule, advise people to use leave-in probes when cooking directly over high heat, as in the case of grilling. Using leave-in probes is fine for the initial stage of two-stage cooking, where the probe and wire can be kept away from high heat, but they are not generally advised for searing. Most probe transitions and wires can’t stand up to the kind of heat that is often found in a grill full of burgers. A hot grill can well exceed the safe range for most probe transitions, especially if there are 1200°F (649°C) flare-ups from the fat dripping onto the flame! (For more nuance on that topic, see our post about grill types and their heat signatures or our post on grilling with leave-in probes.)

The armored probe can take more heat than most probes, and we thought it worth the risk to show you the difference in the two methods. (Incidentally, the probe performed admirably and didn’t burn out.)
DIRECT HEAT GRILLING
When we cooked the burgers over direct heat, their temperature rise was steep and swift. Take a look at the graph of how long it took to go from cold meat to done:
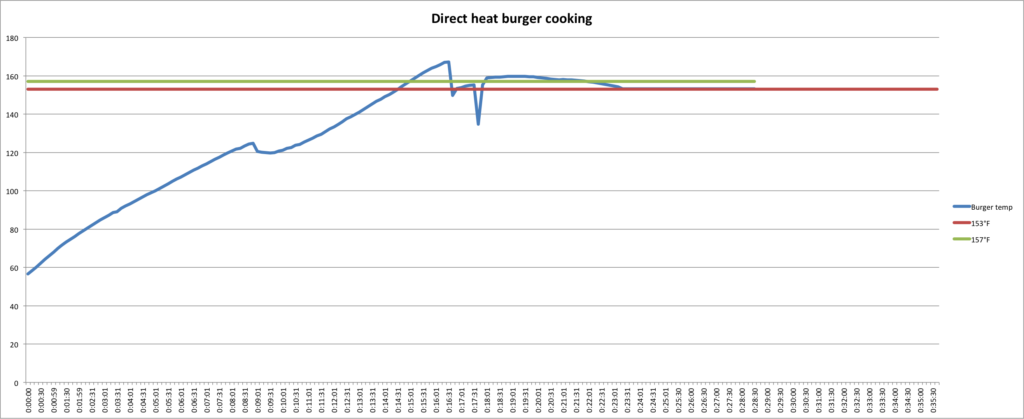
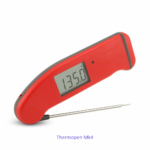
You can see a couple of things. I’ve set lines at 153°F (67°C) and 157°F (69°C) so that you can see in what a short range of time your pull temp occurs. The time from when the beef hits 153°F (67°C) until it reaches 157°F (69°C) is only about 30 seconds. That’s a pretty short window that can easily be missed if you aren’t paying attention, despite using a super-fast Thermapen® Mk4.

One way to understand this is to think of the gradients in the meat. Since the temperature difference between the inside and the outside is quite extreme, the temperature curve from the center outward is quite steep. This means that the temperature will be changing quickly throughout the burger. It’s easy to overshoot a target when the temps are changing so quickly! And in fact, though we took these burgers off the heat at 153°F (67°C), you can see that the carryover cooking took them past the 160°F (71°C) we were aiming for. At our grill heat, we could have taken them off a few degrees earlier and been safe.
(I included the resting period on the right in this graph to make the timescales equal on the two graphs. You can compare and see hFor our two-stage cooking, we cooked the burgers away from the heat with the grill lid closed until their temperature reached 135°F (57°C). When we cooked the burgers at a lower temperature first, we carefully narrowed the range of temperature gradients present in the patties. Our gradients were smaller, and that meant that the temperature change was slower when we eventually put them on the hot side for searing.ow much steeper the temperature climb was in this initial cook than in the graph below.)
TWO-STAGE GRILLING
For our two-stage cooking, we cooked the burgers away from the heat with the grill lid closed until their temperature reached 135°F (57°C). When we cooked the burgers at a lower temperature first, we carefully narrowed the range of temperature gradients present in the patties. Our gradients were smaller, and that meant that the temperature change was slower when we eventually put them on the hot side for searing.
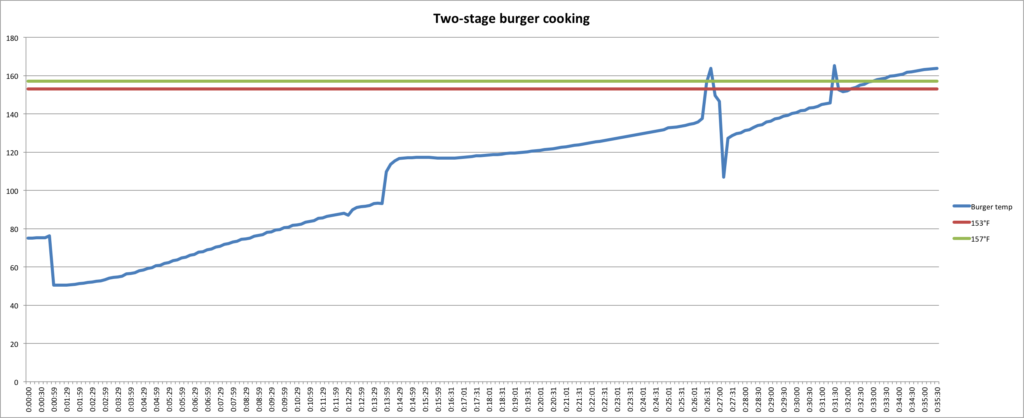
A few things can be gleaned from this graph. First, you can see where my probe thermometer was not in the thermal center at the very beginning. Verifying the thermal center with a Thermapen is essential for proper cooking! And we quickly readjusted the position of the leave-in probe.
But in relation to what we’re focusing on here, the time between 153°F (67°C) and 157°F (69°C) in this case was over one minute, twice the time of the direct-cook burgers. That means you have twice the chance of getting properly cooked, tasty burgers! And with less thermal momentum, there was also less carryover cooking, which means you are also less likely to end up with overcooked burgers once they leave the heat.
As discussed above, this same method can be applied to home-ground burger patties, with even tastier results. Cook over indirect heat until about 20°F (11°C) below your target temperature, then sear them to your Thermapen-perfect desired temperature. If you want medium-rare, keep your first stage cook to 110-115°F (43-46°C). But only if you are grinding your own meat!
CONCLUSION
If your aim is perfect burgers, especially for a crowd, the two-stage method is the way to go. Use a leave-in probe thermometer for the initial cooking stage and a Thermapen Mk4 to finish your burgers on the hot side and you’ll get exactly the results you’re looking for. The more-gentle initial cooking decreases thermal momentum and gives you a target-temperature window that is twice as long as the one you get from direct cooking. So improve your burger game this National Grilling Month, and kick your burgers into a higher gear!

